Hawaii Contractor License C- 37173 LLC Since 2003


Setup your scaffolding
Erecting scaffolding will serve as a safety feature as well as an aesthetically functional feature.
Fit the roof anchors
Your type of roof anchors will depend on the type of roof tiles you have. After setting your scaffolding, the next step is installing the roof anchors on top of your tiles that sit above the rafters.
Attach the frame
This is a critical step if you want your panels to look symmetrical. Make sure everything is aligned, then screw your frame down.
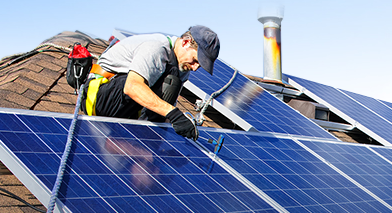
Install the panels
Now that the bars are in place, you can begin laying down your panels. Keep an eye out to make sure your panels stay parallel with the edge of the roof.
Wire the panels on the roof
After your panels are set up, you can begin to wire them. The way in which your wire will depend on your voltage, roof space, amperage, and cover for the wires.
Wire the panels to the inverter
Setting up the wire will involve running the DC wire to the inverter you have in your home. Try to keep the wire hidden and clean. This will improve the lifespan and longevity.
Connect the inverter to your grid and turn on the system
Once everything is connected, switch on your inverter and test that everything is working to your liking.
Related Article: Benefits of Using Solar Panels in Home

14 Aug, 2018
18 June, 2018
14 Aug, 2018
18 June, 2018